
Here's how to make mountain pies (the best camping dinner ever!) over the campfire. Plus, we've got a bunch of fun mountain pie recipe combinations included! (Spoiler - our favorite mountain pie recipe is still the classic pizza one!)

What are mountain pies? (the Best Campfire Food Ever)
If you've never had a mountain pie, you're missing out! And in case you're wondering what in the world we're talking about, let me explain. Mountain pies (also called hobo pies, pudgy pies or campfire pies) are basically just sandwiches cooked in a special cast iron "pie iron" over a campfire!
Mountain pies are one of our absolute favorite things to make over the fire while camping in the great outdoors and we make them often. Even when we're not camping. If you have a fire ring outside, you can make them anytime!
Best thing about mountain pies is that they are super customizable. It's fun to fill your mountain pie sandwich with only your favorite ingredients to make the perfect sandwich.
In this post you'll learn just how to make mountain pies, plus we've included a bunch of mountain pie recipe ideas! Let the outdoor adventures begin...

Ingredients
Mountain pies are basically just sandwiches, so you will need:
- Bread - this can be regular sandwich bread, tortillas, bagels, biscuits, and more. Some folks prefer white bread over wheat, but I really don't mind either one in a mountain pie.
- Meat - anything like sliced deli ham, beef, chicken, or turkey, cooked ground beef or sausage, cooked and shredded chicken, etc.
- Sauce - classic pizza sauce or you can make a homemade sauce for ranch or chipotle flavored mountain pies.
- Cheese - your choice of shredded cheese, sliced cheese or pre-sliced American cheese. And as for what kind, it can be anything like cheddar cheese, mozzarella cheese, whatever your personal favorite is!
- Toppings - really any of your favorite pizza toppings like black olives, diced peppers and onions, mushrooms, and any other yummy things you can think of.
Supplies to Grab:
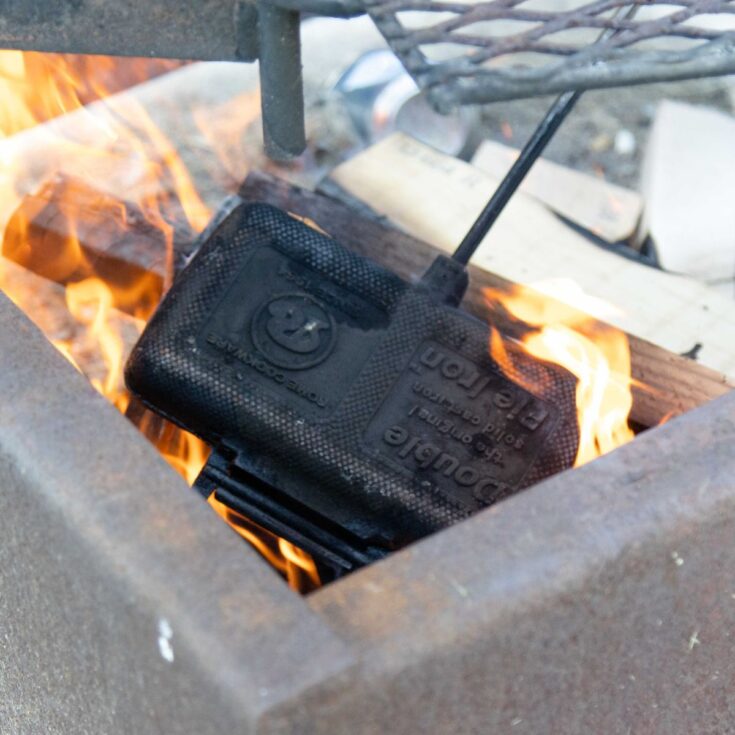
- Pie Iron - this is essential! You'll need a "mountain pie maker" (which is basically just two cast iron skillets with long handles that fit tightly together) to make mountain pies, and we recommend these cast-iron ones from Rome Industries. (You can get either a single pie iron or a double pie iron (we have the double).
- Non-stick cooking spray (or butter or oil)
- Paper towel - or an old rag of some sort is handy to wipe out the pie irons.
- Old pot holders - or grilling gloves are nice to have for handling the hot pie irons coming straight from the campfire.

This post contains affiliate links. As Amazon Associates, we may earn a small commission at no extra cost to you when you purchase through our links. Thanks for supporting our little family and making this content possible!
How to Make Mountain Pies
First, you’ll want to spray the inside of the pie iron well with cooking spray to make sure that your mountain pie won’t stick fast while cooking. (Can also coat with butter or oil)
Place a slice of bread on both pie iron halves. Now pile on the rest of the ingredients, all on just one of the slices of bread. (You don’t want to put toppings on pieces of bread, or they may fall out when you go to close your mountain pie iron!) Assemble in any order you desire; it really doesn’t matter, you can't mess it up!
 on goes the bread...
 now for the sauce
 ...and all the toppings!
Moving quickly, close the pie iron, latch it, and place in the campfire! Allow the mountain pie to cook several minutes per side, then open carefully to check if it’s done. Flip and check every 2-3 minutes until it’s perfectly toasted golden brown. After your mountain pie is finished, carefully and quickly flip out onto a plate.
 cooking the mountain pie in the fire
 MMM, perfect!
 flip onto a plate, and eat:)
Enjoy!
Tips & Tricks for the Best Mountain Pies
Use plenty of non-stick cooking spray! No matter if you choose to use butter, oil, or non-stick cooking spray, don't skimp on it! It's no fun when the perfect mountain pie you just made gets stuck to the iron, and you have to scrape it out with a fork.
Preheat the pie iron in the fire before making your mountain pie to speed up the cooking process! This also helps to make sure that the pie iron is non-stick. But watch those fingers; it’s a little more challenging to build a mountain pie in a piping hot pie iron! (This is probably a little more important to do before the very first use of a brand new pie iron. Otherwise, you totally don't have to!)
You will notice we don't have any amounts for our mountain pie ingredients. Here's how we do it when we make mountain pies: we set up all the ingredients in individual containers on the picnic table and everyone can build their own, adding as much or as little as they like of each ingredient!
Fun sandwich idea: put the diced peppers and onions on the outside of the sandwich (beneath the bread in the pie iron) instead of inside the sandwich to toast them into the bread!
Cleaning + Storing your Mountain Pie Iron
After making mountain pies, I like to take an old wet rag (and scrub brush) and wipe out any stuck-on bits of food. Then rub a little bit of oil over the inside of the pie iron.
To store the pie irons, it works well to stand them in an old trash can or five gallon bucket or you can also buy a special mountain pie iron bag.

Mountain Pie Recipes to Try on Your Next Camping Trip
Below, you'll see a bunch of different mountain pie recipes! The instructions are all pretty similar to the ones above.
When using refrigerated biscuits from the can, here's how we like to do it: take one raw biscuit, divide it in half, and press each raw dough half carefully into both sides of a greased mountain pie iron. Proceed to build your mountain pie like normal! When using a tortilla: place the tortilla on a plate, add your mountain pie toppings, then fold the tortilla envelope style and place into the greased pie iron.
Classic Pizza Mountain Pies
- Soft flour tortillas or bread slices
- Pizza sauce
- Cooked ground beef
- Sliced ham
- Pepperoni
- Sliced cheese
- Any of your favorite pizza toppings:)
Grilled Cheese Mountain Pie
- Bread slices
- Cheese
Chicken BBQ Mountain Pie
- Soft flour tortillas
- Cooked and diced chicken
- Barbecue sauce
- Shredded cheese
Peanut Butter & Jelly Mountain Pie
- Bread slices
- Creamy peanut butter
- Jelly
Tasty Taco Mountain Pie
- Soft flour tortillas
- Cooked and browned ground beef (seasoned with taco seasoning)
- shredded cheese
- Diced onions and peppers
- Salsa
- Sour cream
Tuna Melt Mountain Pie
- Bread slices or soft flour tortillas
- Tuna salad
- Sliced cheese
Chili Cheese Mountain Pie
- Soft flour tortillas
- Chili soup
- Shredded cheese
Chicken Bacon Ranch Mountain Pie
- Soft flour tortillas
- Cooked and shredded chicken
- Cooked and chopped bacon (or bacon bits)
- Ranch dressing
- Shredded cheese
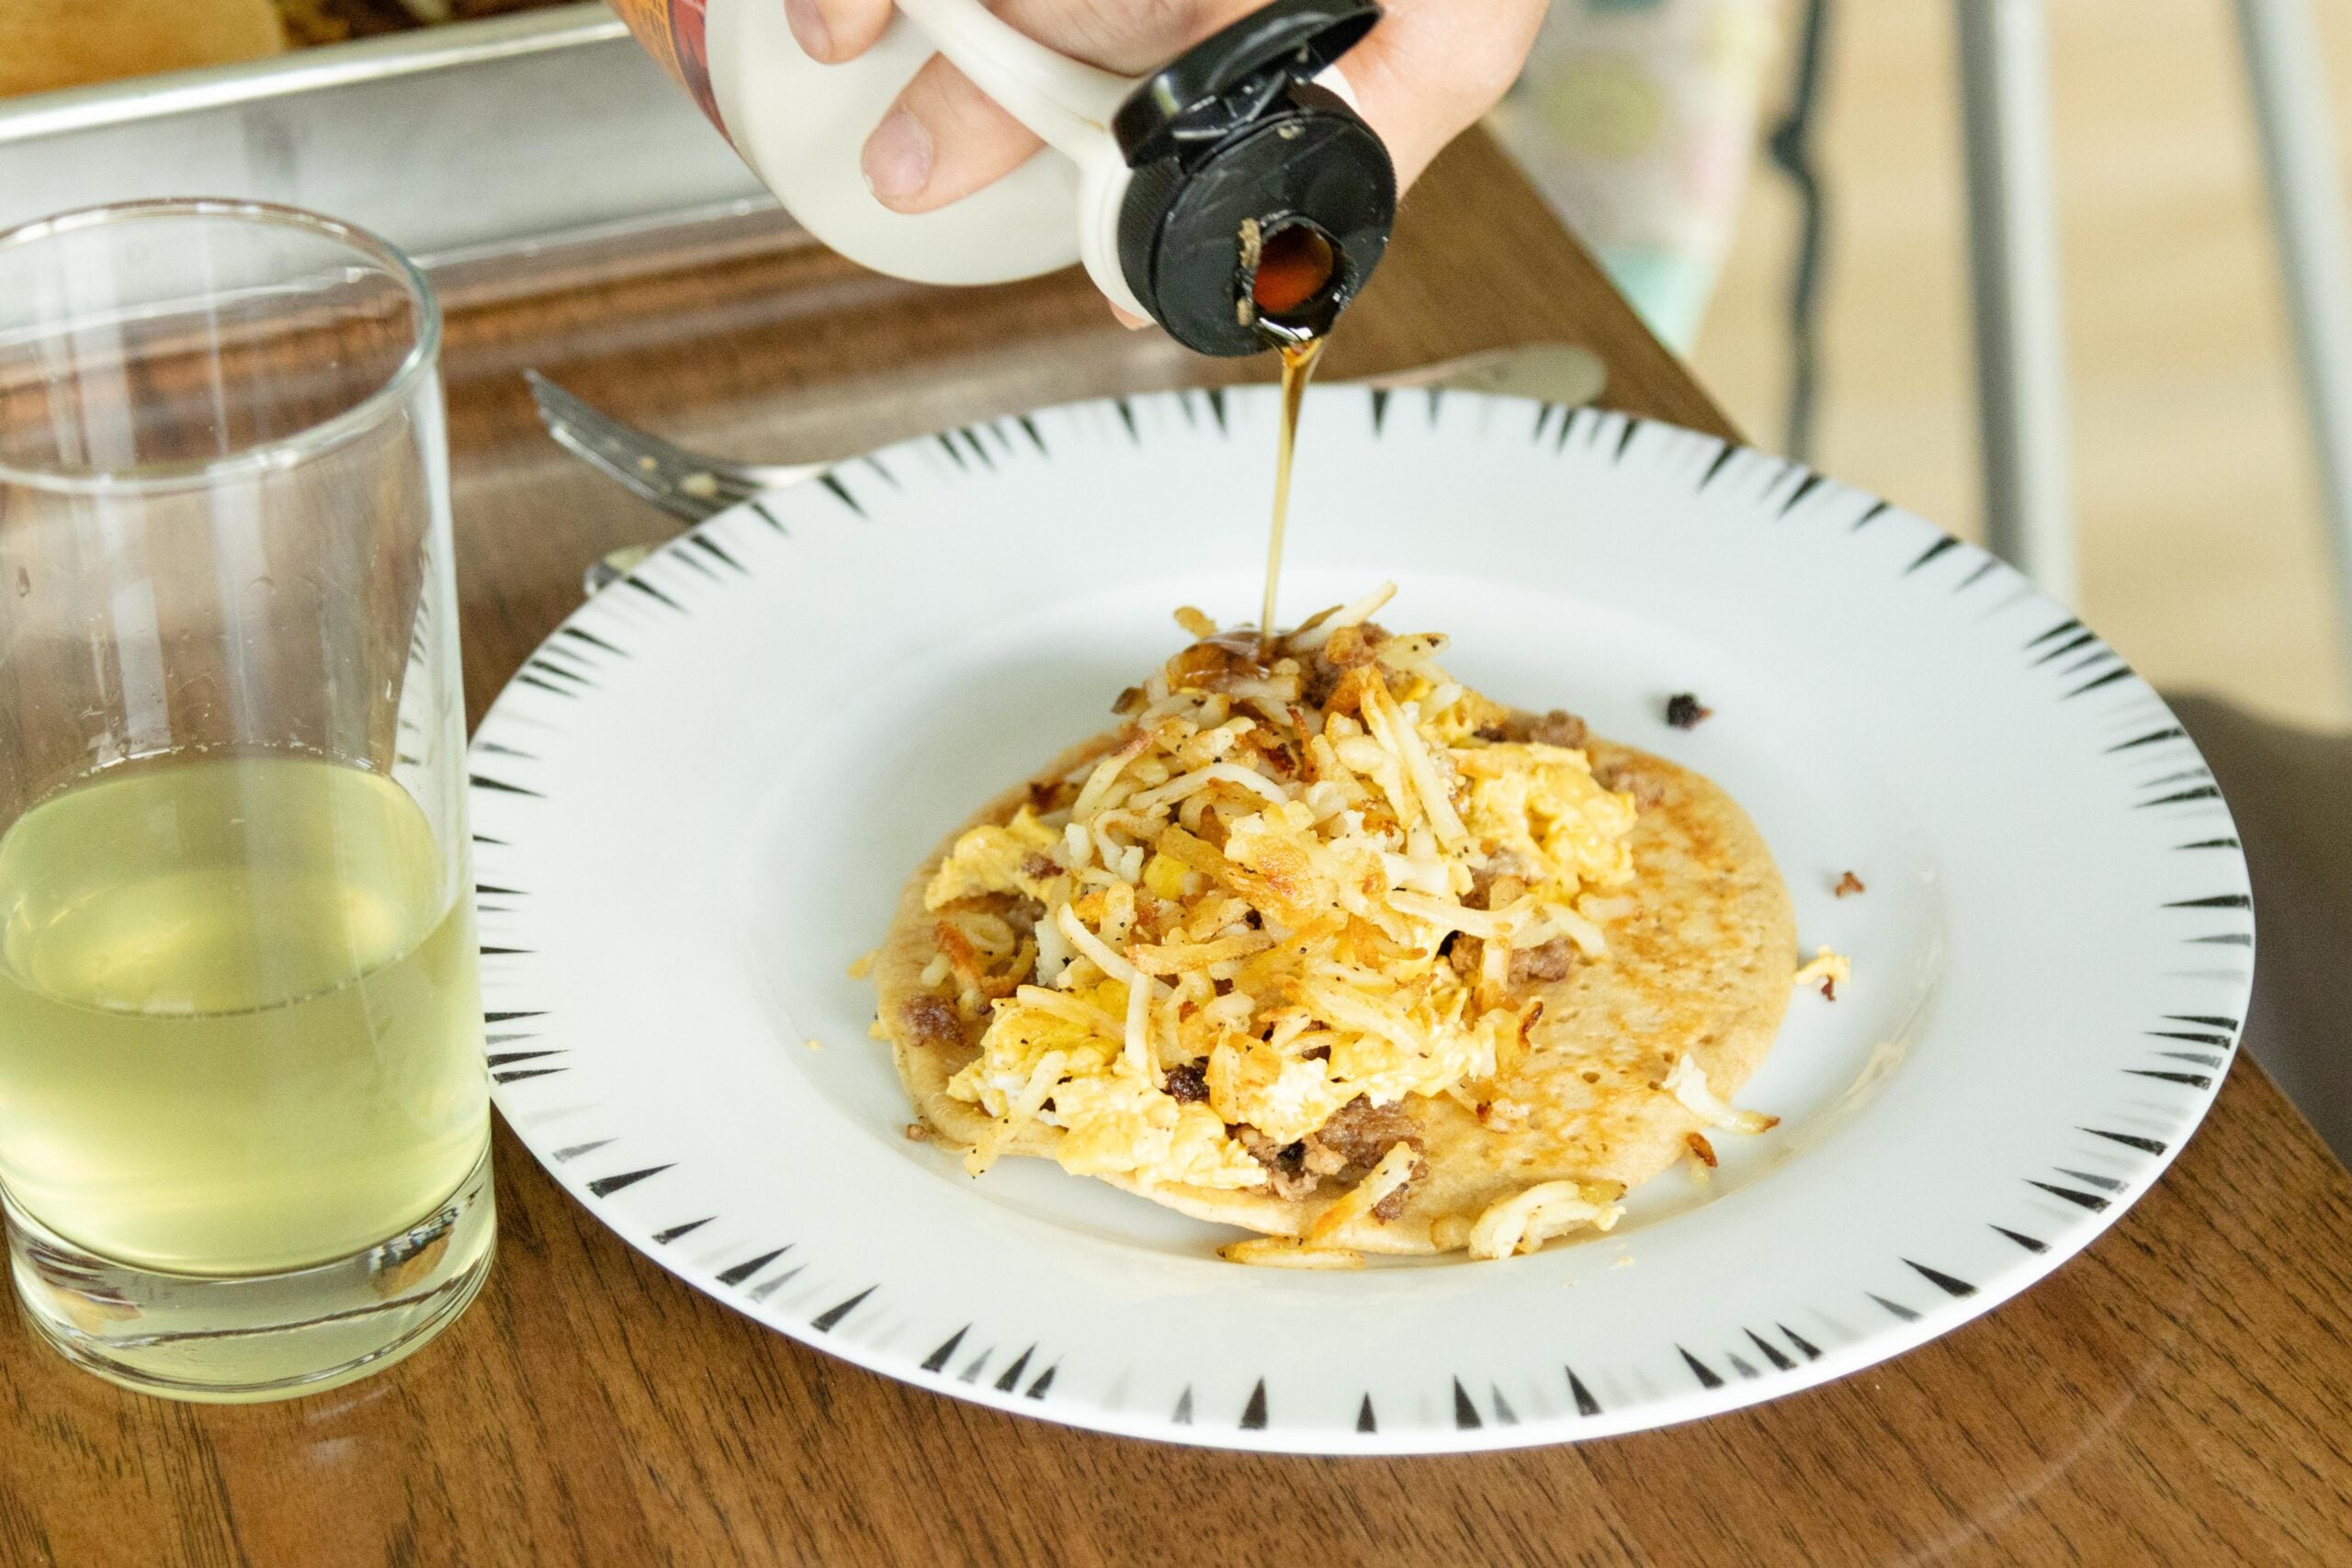
Ultimate Breakfast Mountain Pie
- Biscuits (from a can)
- Scrambled eggs
- Cooked and chopped bacon (or bacon bits)
- Shaved deli ham
- Sliced cheese
- Sausage gravy (optional)
Breakfast Burrito Mountain Pie
- Soft flour tortillas
- Scrambled eggs
- Cooked ground sausage
- Cooked bacon bits
- Shredded cheese
- Diced peppers and onions
- Salsa
- Sour cream
Fruit Pizza Mountain Pie
- Soft flour tortillas
- Fruit pie filling (or fresh fruit)
- Cream cheese spread
Sprinkle with powdered sugar before eating!
S'mores Mountain Pie
- Bread slices
- Chocolate chips
- Marshmallows (or marshmallow creme)
- Graham cracker crumbs and pieces
- Creamy peanut butter (optional)
- Nutella (optional)
Strawberry Shortcake Mountain Pie
- Angel food cake, thinly sliced
- Sliced fresh strawberries or strawberry pie filling
Serve with Cool Whip or homemade whipped cream!
Turtle Mountain Pie
- Biscuits (from a can)
- Chocolate chips
- Caramel sauce
- Mini marshmallows
- Chopped pecans
More fun recipes you might enjoy:
Share this post!
Thanks, we appreciate it.

Classic Pizza Mountain Pies
Here's a simple base recipe for classic pizza mountain pies. Mountain pies are one of our absolute favorite things to make over the fire while camping in the great outdoors and we make them often!
Ingredients
- Bread slices
- Cooked ground beef
- Deli ham slices
- Sliced cheese
- Pizza sauce
- Pizza toppings
Instructions
First, you’ll want to spray the inside of the pie iron well with cooking spray to make sure that your mountain pie won’t stick fast while cooking.
Place a slice of bread on both pie iron halves. Now pile on the rest of the ingredients, all on just one of the slices of bread. (You don’t want to put toppings on both pieces of bread, or they may fall out when you go to close your mountain pie iron!) Assemble in any order you desire; it really doesn’t matter, you can't mess it up!
Moving quickly, close the pie iron, latch it, and place in the campfire! Allow the mountain pie to cook several minutes per side, then open carefully to check if it’s done. Flip and check every 2-3 minutes until it’s perfectly toasted golden brown. After your mountain pie is finished, carefully and quickly flip out onto a plate.
Enjoy!
Notes
- Use plenty of non-stick cooking spray! No matter if you choose to use butter, oil, or non-stick cooking spray, don't skimp on it! It's no fun when the perfect mountain pie you just made gets stuck to the iron, and you have to scrape it out with a fork.
- Put the diced peppers and onions on the outside of the sandwich (beneath the bread in the pie iron) instead of inside the sandwich to toast them into the bread!
- Preheat the pie iron in the fire before making your mountain pie to speed up the cooking process! This also helps to make sure that the pie iron is non-stick. But watch those fingers; it’s a little more challenging to build a mountain pie in a piping hot pie iron! (This is probably a little more important to do before the very first use of a brand new pie iron. Otherwise, you totally don't have to!)
- You will notice we don't have any amounts for our mountain pie ingredients. Here's how we do it when we make mountain pies: we set up all the ingredients in individual containers on the picnic table and everyone can build their own, adding as much or as little as they like of each ingredient!
Nutrition Information:
Yield:
1Serving Size:
1Amount Per Serving: Calories: 502Total Fat: 19gSaturated Fat: 8gTrans Fat: 1gUnsaturated Fat: 9gCholesterol: 81mgSodium: 1530mgCarbohydrates: 47gFiber: 5gSugar: 11gProtein: 34g
Nutritional information is based on third-party calculations and should be considered an estimate only. Actual nutritional content will vary based upon brands used, measuring methods, cooking method, portion sizes, and more.
As always...
Thanks for visiting our small town! We appreciate you. Make yourself comfy and stay awhile!
'til next time,
We love you and we’ll be praying for you,
Julie

Vasudha Hospital in Mancherial says
Thanks for sharing such a fun and detailed guide to making mountain pies! Your recipe ideas and campfire tips are super helpful, especially the tortilla and biscuit variations. We tried the classic pizza mountain pie on our last camping trip and it was a big hit—definitely bringing the pie iron every time now!
Julie says
Yay! That's awesome.💛
PRAVA says
nice recipie