
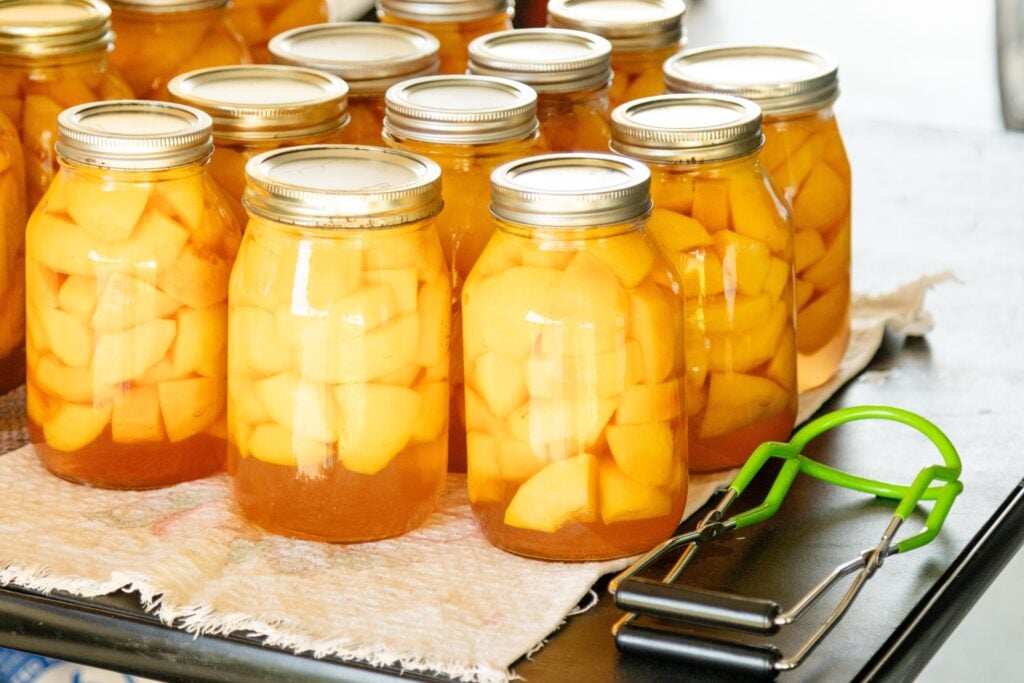
Learn how to can peaches at home so you can savor their delightful flavor well beyond the harvest season!
Preserving Peaches at Home with Water Bath Canning (Beginners Welcome!)
Ah, it's peach season. Fresh summer peaches...yum.🍑
Every year, without fail, my mom would can peaches by the bushel, so we could enjoy them all year long! Fun fact, my mom always served homemade chocolate cake and peaches at almost every meal! Well, not breakfast. But almost every lunch and supper we had cake and canned peaches (or canned pears) for dessert.
So, canning peaches is a yearly event that happens every summer in a lot of Mennonite kitchens!
If the thought of canning feels a little intimidating, don’t worry, you’re definitely not alone. This guide will walk you through everything, making the process both enjoyable and rewarding!

Which peach variety is best for canning?
First of all, you'll need to get yellow peaches, since the white-flesh peaches aren't acidic enough to be safely water bath canned without adding acid. Then, there are clingstone and freestone peaches. The clingstone peaches have pits that need to be cut out and the freestone peaches have pits that easily can be popped out.
With over 300 peach varieties grown in the US, I can't go over them all here, but here's a little list of common peach varieties that work well for canning:
- Baby Gold (clingstone) - this is what I am canning today. It's more of a commercial peach, which makes it great for canning. The peaches stay nice and firm even after water bath canning!
Freestone varieties I've heard good reviews on:
- Bounty
- Contender
- Elberta
- Gloria
- Madison
- O'Henry
- Red Haven
I still stick to Baby Gold's since they stay firm even though they are a little more work to can. A freestone peach is easier to pit and peel, but in my experience they are softer after canning. Also, freestone peaches tend to have more flavor, but still, I dislike mushy peaches.😅 My mom always canned (and still cans!) freestone peaches like Contender.
Where can I find peaches for canning?
If you're like me, you might not have your own peach trees (yet) so you'll need to buy peaches if you want to can them.
Here's a few places to check if you're not sure where to source peaches:
- Local farms, farmstands, or farmer's markets (and here's the link to the USDA Local Food Directory to check for one nearby)
- A "u-pick" patch (click here to see if there's one near you)
- Azure Standard
- Local bulk food store - if you live near a Mennonite or Amish bulk food store, there's a good chance they'll get loads of peaches in during the summer.
How do I Know When my Peaches are Ready to Can?
When they are no longer green, but still fairly firm, peaches are ready to can! Too green, and the flavor isn't as good and too soft, they will be hard to handle without mushing them.
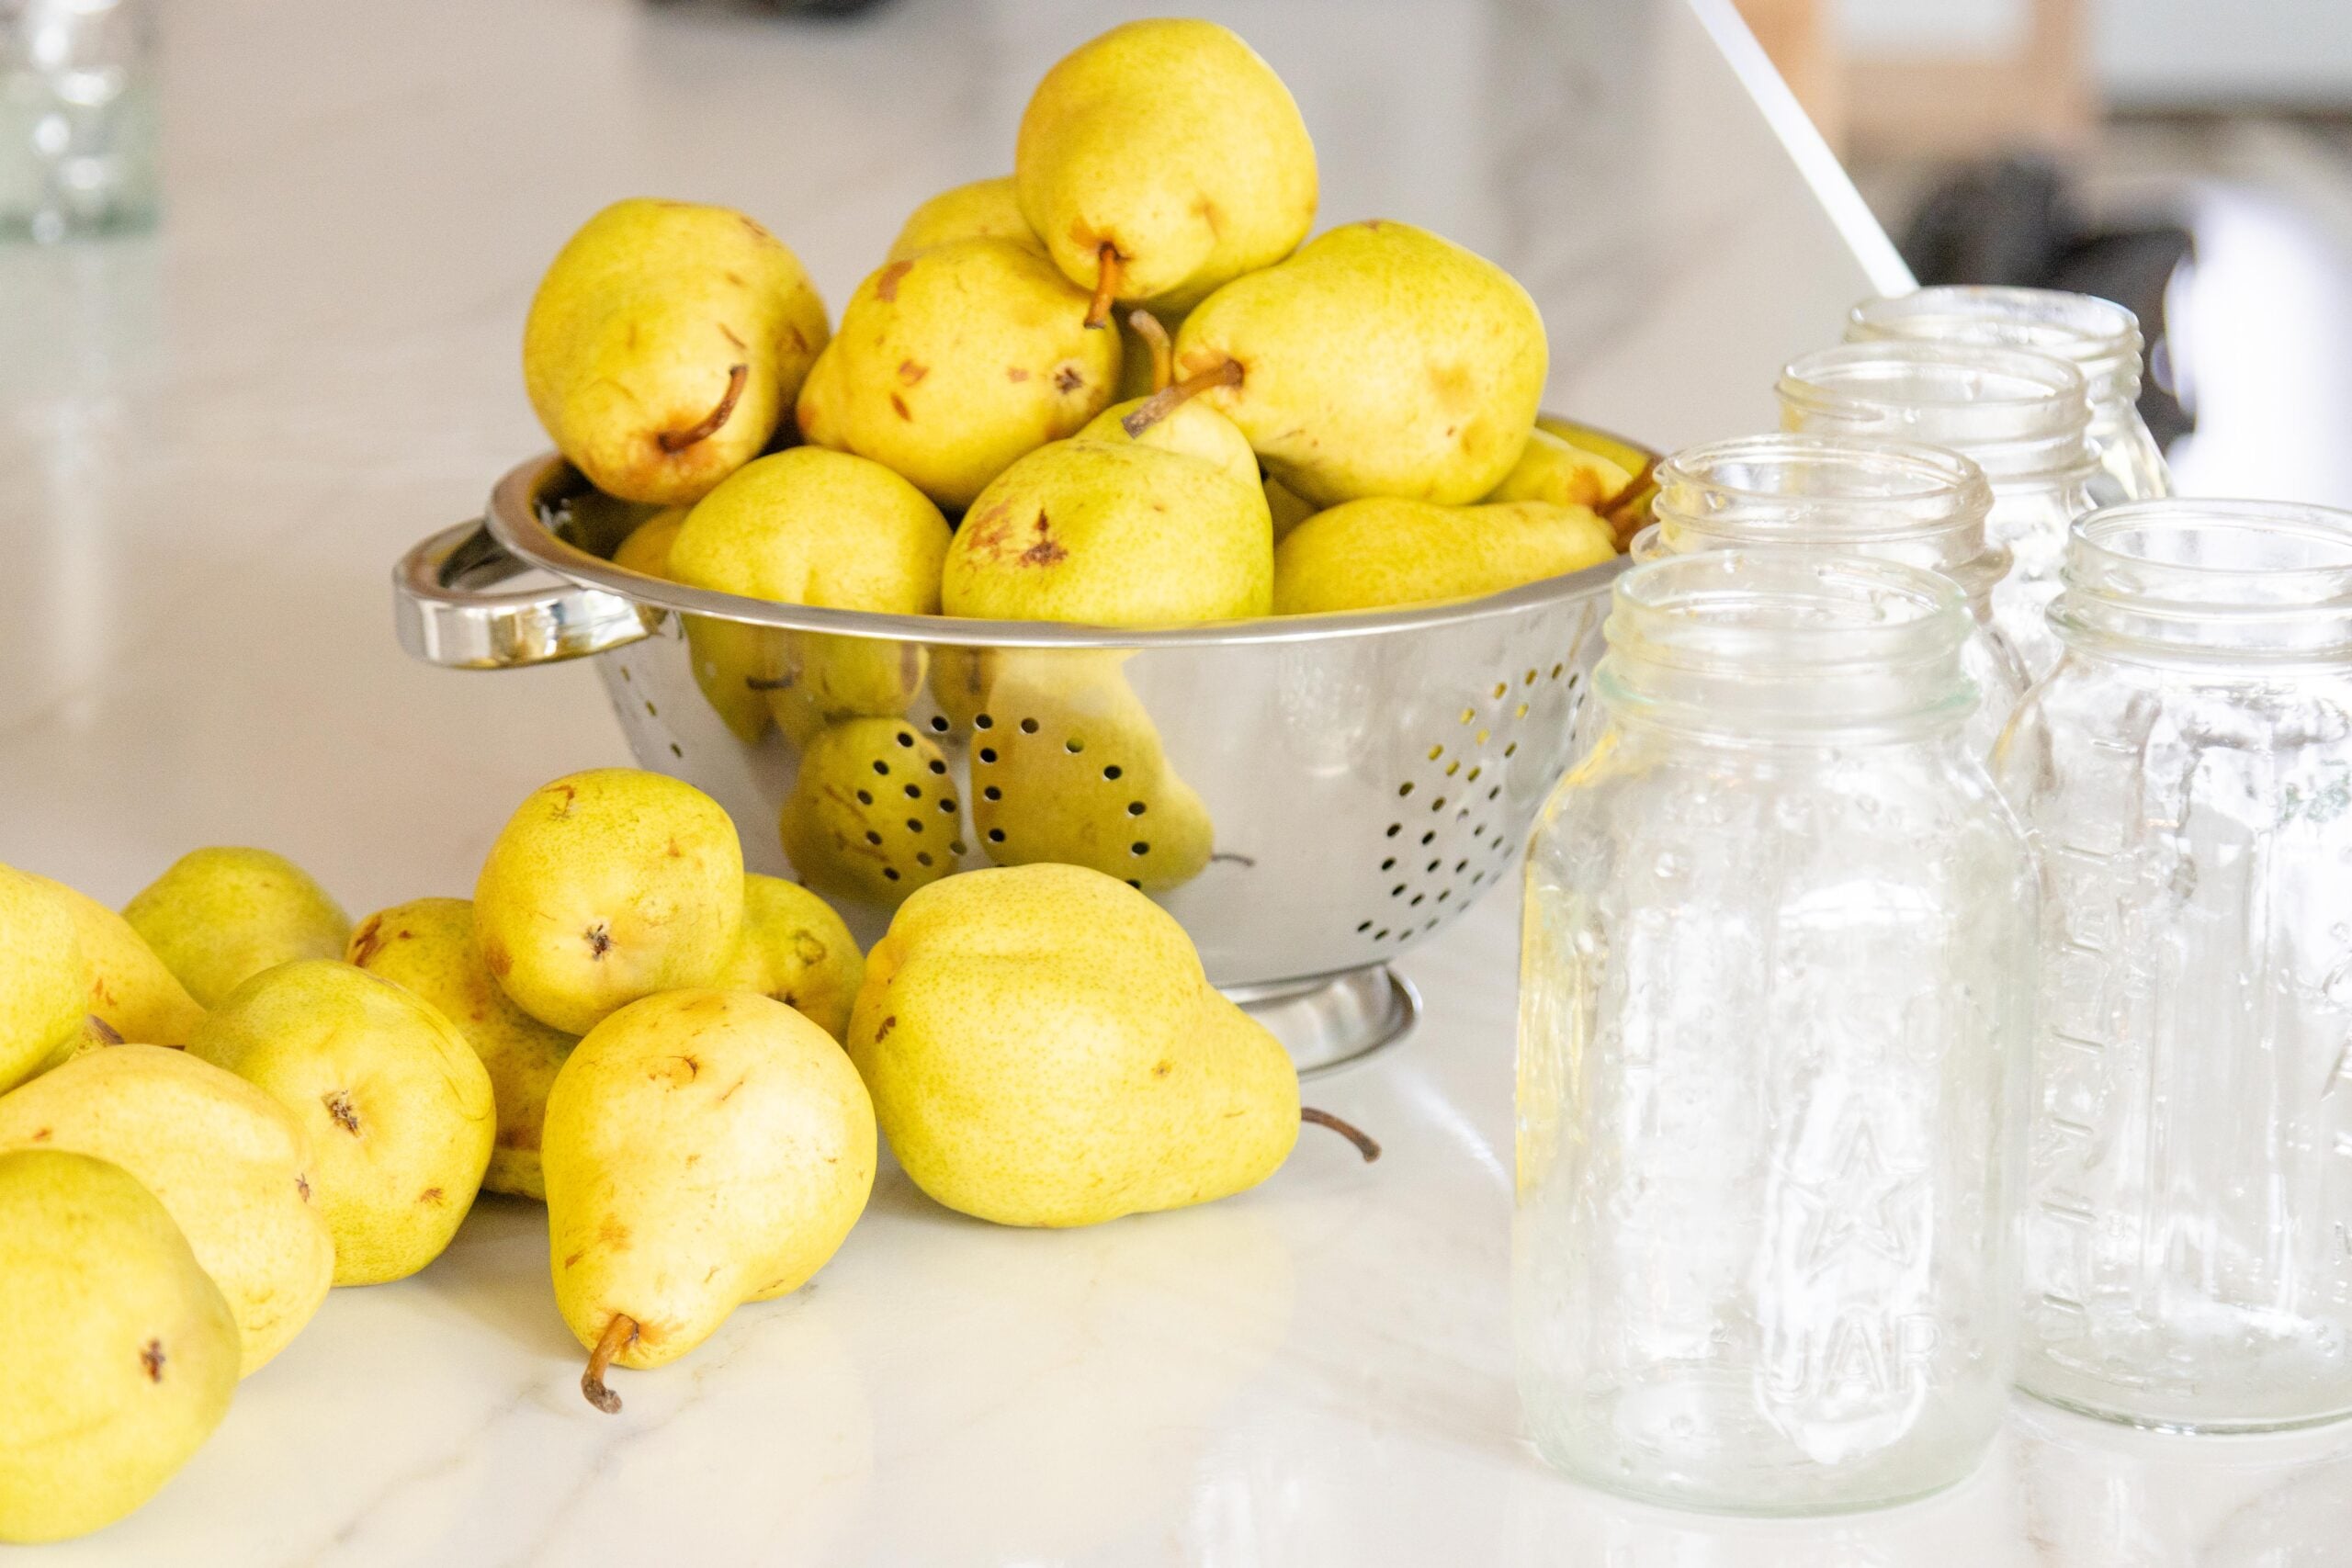
Supplies You Will Need
- Jars - glass canning jars, lids and rings. You'll want good quality jar lids such as Ball or Superb.
- Sugar - white granulated sugar (see the Alternative Sweeteners section below if you'd rather not use so much sugar)
- Water - I use plain water to top off the jars after filling
- Peaches - I bought a bushel of Baby Gold's at a local bulk food store
- Knife + peeler - I use my little Wusthof paring knife and OXO peeler
- Water Bath Canner - I have this water bath canner and I especially like the little feature on the knob that takes the guesswork out of knowing when to start timing the canning process!
- Jar grabber - you'll need a jar lifter thingy to remove jars from the hot water
- Funnel - I also like my wide mouth funnel when it comes to canning anything!
How to Can Peaches (the Mennonite Way!)
1. Wash your jars.
Wash each jar (a dishwasher works great for washing and sanitizing jars) then add a fourth cup of sugar to each jar. (I do them in batches of seven quarts, which is a canner full.) Then add about an inch of hot water to each jar and stir to dissolve the sugar.


2. Rinse the peaches.
This is especially important for Baby Golds, other peach varieties not so much. Rinse off that fuzz!

3. Halve, Pit, & Peel
Cut each peach in half, cut (or pop) out the pit, then peel the peach halves. Put the peeled peaches into a large bowl of cold water to rinse off any remaining fuzz.


4. Fill the jars with peaches.
You can either cut the peaches in blocks, slice them or let them in halves and fill the jars to the bottom ring on the jar neck, leaving about ½" headspace. Add water to each jar up to the bottom ring on the neck of the jar. If you're worried about air bubbles in the jar, lightly tap on the side of the jar, or use a bubble remover.


5. Place lids on the jars.
Wipe each jar rim with a damp cloth and place a lid on each one, then screw bands on each jar just until it's "finger tight". (No need to tighten it as hard as you can!)

6. Water bath can the peaches.
Place the canner on a large burner on the stovetop, place jars into the canner, add enough water to cover the jars by 1-2 inches, then turn the burner on high until the water reaches a rolling boil. Once the water is really boiling, start timing, and turn the burner back just a little. Time the boiling canner for 10 minutes. After ten minutes, turn the burner off, remove the lid and time another 10 minutes. Then take the jar lifter and remove all the jars from the canner and let them rest on a towel on the counter.


Just so you know: the National Center for Food Preservation recommends canning peaches according to the table below:

And as you can see, my processing time is a little shorter (20 minutes total) than what they recommend which is 35 minutes (or more, depending where you live) for quarts. My mom always did 6 minutes boiling, 6 minutes resting in the hot canner (12 minutes total) when she canned Red Havens or Contenders, and it's one of those things where different folks have different methods. To be on the safe side, you can always follow the NCHFP and if you have any more canning questions, you can do some more research over there!
7. Let the jars cool.
Soon you should start to hear the ping of the lids sealing, which is music to my ears! Let those jars set there and cool for 12-24 hours before removing the rings, wiping any stickiness off the jars with a wet rag and storing on your can shelf. I like to check after an hour or two, just to make sure they all sealed! You can tell if a jar isn't sealed by pressing on it. If it "pops" and isn't sucked down tight on top of the jar, it didn't seal. Refrigerate any unsealed jars and eat those peaches within a week, or turn them into a dessert.
8. Repeat the process until all the peaches are canned!
After taking a batch of canned peaches out of the canner, take a pitcher and scoop out some of the boiling hot water and add a pitcher of cool or slightly warm water to temper the water in the canner. Then proceed to fill the canner with another set of filled jars!
On canning day, it's always a fun challenge to see if you can have the next set of jars all ready for the canner by the time the first ones are done!
9. Store the peaches and enjoy!
Store the canned peaches in a cool, dry place. (I store mine on shelves in my pantry.) Canned peaches should be good for a year (or more!).
When you open a jar, the lid should come off with a "pop" as the jar unseals. If it doesn't, and you suspect the jar wasn't sealed, it might be best to throw it out. If you smell an odd smell, see signs of mold or if the peaches are discolored, they probably spoiled and should be discarded!
Alternative Sweeteners for Canning Peaches
If you're trying to stay away from sugar, there are a few other things you can add instead of a fourth cup of sugar:
- Maple syrup - add 1-2 tablespoons per quart of peaches
- Fruit juice - skip the sweetener and top off the jars with straight orange juice, apple juice, white grape juice or pineapple juice or mix the juice half and half with water and then top of the jars.
- Stevia - I'd recommend the KAL brand of stevia (and I'd get the liquid version); for liquid, add ¼ tsp. per quart of peaches and for powdered, it'd be a very tiny amount like dividing ⅓ teaspoon of stevia among 4 quart jars of peaches.
Tips and Tricks, & Notes
- Hot packing vs. raw packing - my method of canning peaches is also know as raw pack water bath canning. I'd say it's easier than the hot pack method, which is when you heat the peaches in a simple syrup and dump the hot syrup and peaches into the jars and can them right away. I'd also say the raw pack method is less stressful, especially with littles around! But, some folks say the peaches stay nicer for longer if they're hot packed, so it's up to you.
- One bushel of peaches usually yields 21-25 quarts of peaches. Typically, I use quart jars to can peaches, but I've already done pint jars following these same steps.
- Optional add-ins - some folks add vanilla extract to their peaches for a little more flavor! Add about ⅛ teaspoon per quart. Also, I've seen people add Vitamin C powder to peaches to keep the color bright, even after canning! Use a pinch of vitamin c per quart. And I haven't tried either of these (yet) so if you do, let me know how it turned out!
- Slicing tip: turn an apple corer upside down on the top of the jar. Carefully press the peach down on top of it, cutting the peach into pieces directly into the jar. And, watch your fingers!
Share this "How to Can Peaches" post!
Thanks, we appreciate it.

Peach Recipes


How to Can Peaches
Learn how to can peaches at home so you can savor their delightful flavor well beyond the harvest season!
Materials
- Peaches
- Sugar
- Water
Tools
- Water bath canner
- Jars, lids and rings
- Jar lifter
- Knife
- Peeler
Instructions
- Wash your jars. Wash each jar (a dishwasher works great for washing and sanitizing jars) then add a fourth cup of sugar to each jar. (I do them in batches of seven quarts, which is a canner full.) Then add about an inch of hot water to each jar and stir to dissolve the sugar.
- Rinse the peaches. This is especially important for Baby Golds, other varieties not so much. Rinse off that fuzz!
- Halve, Pit, & Peel. Cut each peach in half, cut (or pop) out the pit, then peel the peach halves. Put the peeled peaches into a large bowl of cold water to rinse off any remaining peach fuzz.
- Fill the jars with peaches. You can either cut the peaches in blocks, slice them or let them in halves and fill the jars to the bottom ring on the jar neck, leaving about ½" headspace. Add water to each jar up to the bottom ring on the neck of the jar. If you're worried about air bubbles in the jar, lightly tap on the side of the jar, or use a bubble remover.
- Place lids on the jars. Wipe each jar rim with a damp cloth and place a lid on each one, then screw bands on each jar just until it's "finger tight". (No need to tighten it as hard as you can!)
- Water bath can the peaches. Place the canner on a large burner on the stovetop, place jars into the canner, add enough water to cover the jars by 1-2 inches, then turn the burner on high until the water reaches a rolling boil. Once the water is really boiling, start timing, and turn the burner back just a little. Time the peaches for 10 minutes. After ten minutes, turn the burner off, remove the lid and time another 10 minutes. Then take the jar lifter and remove all the jars from the canner and let them rest on a towel on the counter.
- Let the jars cool. Soon you should start to hear the ping of the lids sealing, which is music to my ears! Let those jars set there and cool for 12-24 hours before removing the rings, wiping any stickiness off the jars with a wet rag and storing on your can shelf. I like to check after an hour or two, just to make sure they all sealed! You can tell if a jar isn't sealed by pressing on it. If it "pops" and isn't sucked down tight on top of the jar, it didn't seal. Refrigerate any unsealed jars and eat those peaches within a week, or turn them into a dessert.
- Repeat the process until all the peaches are canned! After taking a batch of canned peaches out of the canner, take a pitcher and scoop out some of the boiling water and add a pitcher of cool or slightly warm water to temper the water in the canner. Then proceed to fill the canner with filled jars of peaches!
- Store the peaches and enjoy! Store the canned peaches in a cool, dry place. (I store mine on shelves in my pantry.) Canned peaches should be good for a year (or more!).
Notes
Just so you know: the National Center for Food Preservation recommends canning peaches longer, like 25-30 minutes, or even longer. And as you can see, my processing time is a little shorter than what they recommend. I've never had a problem canning them shorter, but you'll have to research and decide for yourself!
When you open a jar, the lid should come off with a "pop" as the jar unseals. If it doesn't, and you suspect the jar wasn't sealed, it might be best to throw it out. If you smell an odd smell, see signs of mold or if the peaches are discolored, they probably spoiled and should be discarded!
Recommended Products
As an Amazon Associate and member of other affiliate programs, I earn from qualifying purchases.
-
 Ball Regular Mouth Mason Glass Jar Lids (24-Count), Silver
 -
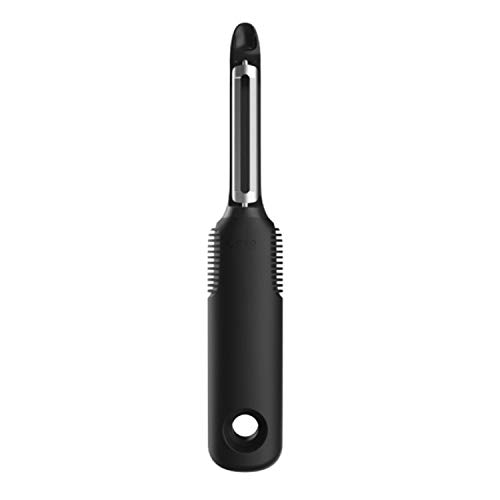 OXO Good Grips Swivel Vegetable Peeler
 -
 WÜSTHOF Gourmet 3" Spear Point Paring Knife, Black
 -
 Eeoyu Canning Jar Lifter Tongs Stainless Steel Jar Lifter with Grip Handle for Home Kitchen (Green)
 -
 Harvest Stainless Steel 20 Qt Canning Pot with Rack | Water Bath or Steam Canning | Works on All Stovetops Including Induction, Glass, Gas (Stainless Steel Canner + Tools) (Stainless Steel Canner)
As always...
Thanks for visiting our small town! We're delighted to have you and you're more than welcome to stay awhile and explore!
'til next time,
We love you and we’ll be praying for you,
Julie

Leave a Reply