
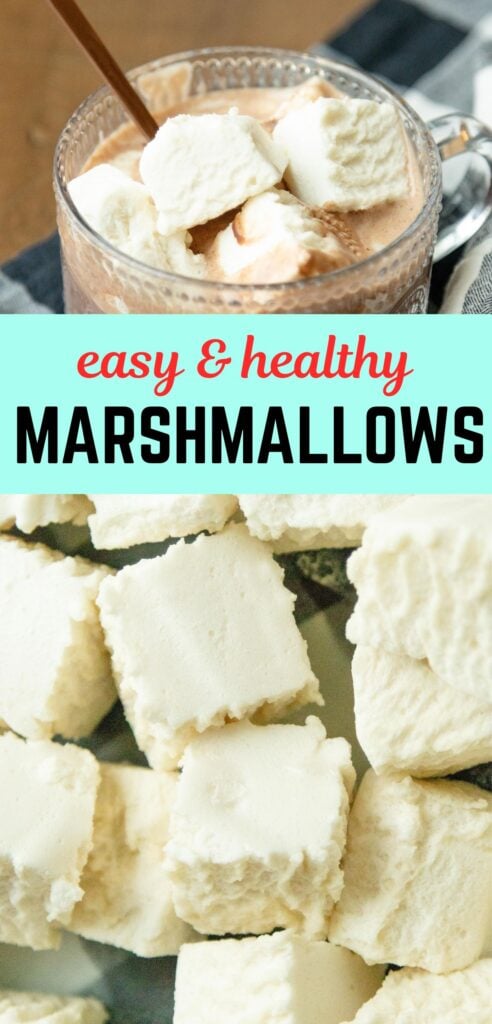
This Easy Healthy Homemade Marshmallows Recipe uses natural sweeteners like honey or maple syrup instead of corn syrup, creating treats you can feel good about eating! You will need just a few quality ingredients and about 20 minutes of active time to create fluffy, flavorful marshmallows (that are better than store-bought marshmallows) with a completely clean ingredient list. Making marshmallows at home sounds complicated, but it's actually pretty easy!
Making Homemade Marshmallows (with no corn syrup or sugar!)
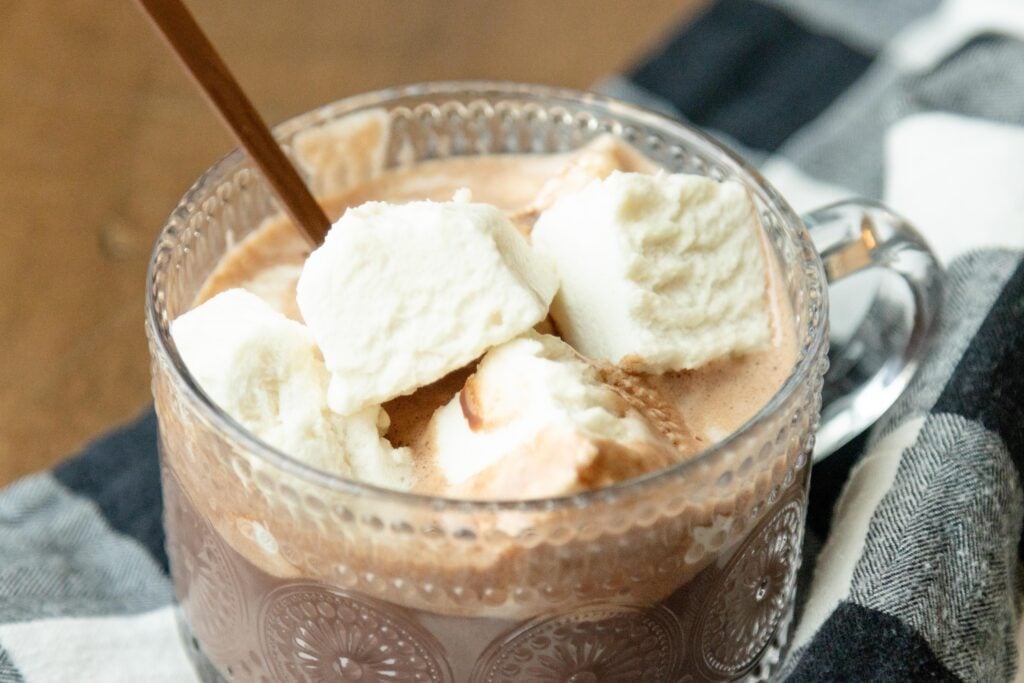
It's cold, it's gray and I think, just maybe, I may have seen some flurries happening outside. I believe there's a chance of snow in the weather forecast and I know there's a 100% chance of hot chocolate in the kitchen. 🙂 This super simple hot chocolate recipe has been on repeat around here lately!
But a cup of hot chocolate is not complete without - you guessed it - marshmallows.
Of course, you can always buy marshmallows at the store, but these days I'm a little more aware of ingredients in food, and eek. I think I'll make my own. 🙂
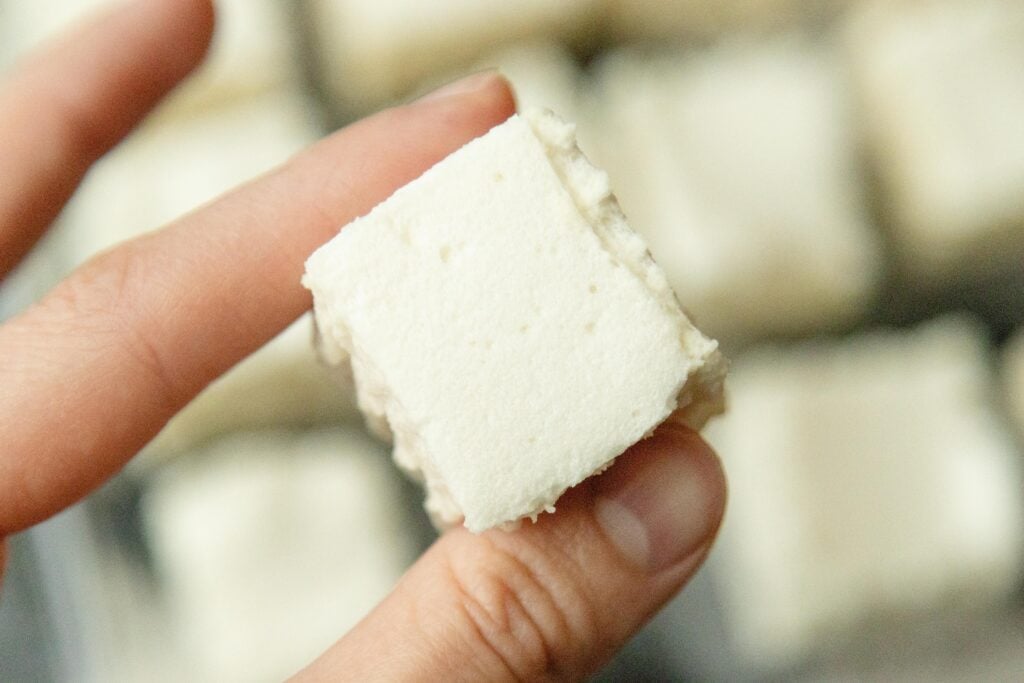
Anyway, all that to say, it is actually super simple to make your own marshmallows. And they're healthy! No sugar or high fructose corn syrup in these. And they're good. Also, they melt into the most wonderful marshmallow puddle on the top of a cup of homemade hot cocoa. 🙂
You can use them any place you would use regular marshmallows from the store, like in Chocolate Surprise Cookies, campfire s'mores, and so on.
Or you can eat them plain, if you're wanting a sweet treat any time of the day.
Supplies You'll Need (and what we used!)
- Measuring cups and spoons
- Saucepan + whisk
- Mixer - the Kitchenaid stand mixer works about the best, in my experience. Though you can use a mixing bowl and electric hand mixer as well.
- A pan - depending on what size marshmallows you want. A 9x13 pan makes large, about 1-inch marshmallows, so if you want mini marshmallows, something like a jellyroll pan would be better. This time I used my glass Pyrex 9x13 pan.
- Kitchen knife - preferably a nice, sharp knife (my knife was pretty dull, hence the jagged edges on my marshmallows) or a pizza cutter works to cut them, too.
- Grease for the pan - a neutral oil (like avocado oil or butter) to grease the pan
This post contains affiliate links. As Amazon Associates, we may earn a small commission at no extra cost to you when you purchase through our links. Thanks for supporting our little family!

Ingredients
- Water
- Salt
- Honey (or pure maple syrup) Today I made honey marshmallows, but I actually almost prefer maple syrup marshmallows!
- Vanilla extract
- Gelatin - something like this Vital Proteins Beef Gelatin powder. Currently I have some gelatin from the local bulk food store (and I have no clue what kind it is)!
- Dusting powder - this is optional, but if you don't want your marshmallows to stick together, you'll probably need to toss them in corn starch, arrowroot powder, or powdered sugar. (Or a combination of these.)
Find the full recipe and instructions on a printable recipe card below!
How to make Easy Healthy Homemade Marshmallows
First, dump the cold water into the bowl of a stand mixer. Sprinkle the gelatin onto the water and let it bloom for about 5 minutes.

Meanwhile, mix the hot water and honey and salt together in a saucepan and bring to a boil, stirring often. (And yes, I'll be using my fork to stir, my one whisk is dirty from making hot chocolate again.)


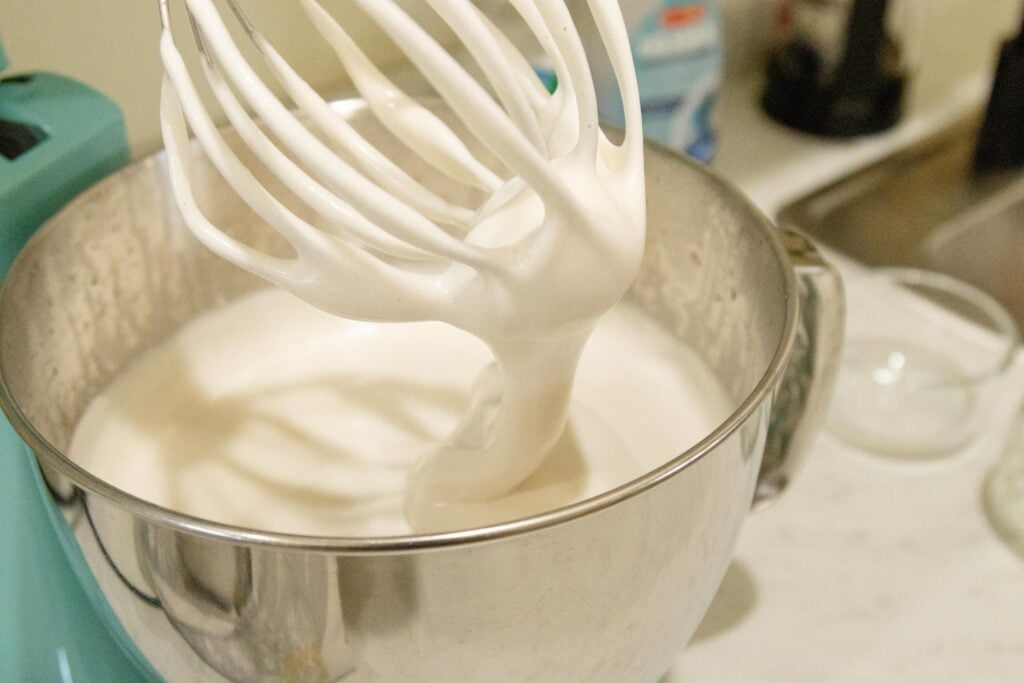
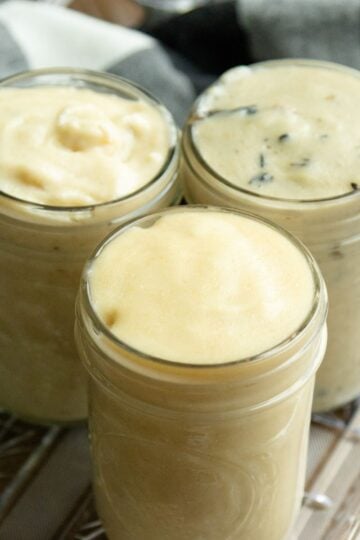
Turn the mixer on low speed (using the whisk attachment) and slowly pour in the boiling honey mixture, mixing all the while. Increase the mixer speed to high speed (go slow, to avoid splatter!) and beat for 5-10 minutes, until soft peaks form. Add in the vanilla extract sometime during this whipping process. (The finished consistency should be about like marshmallow fluff.)


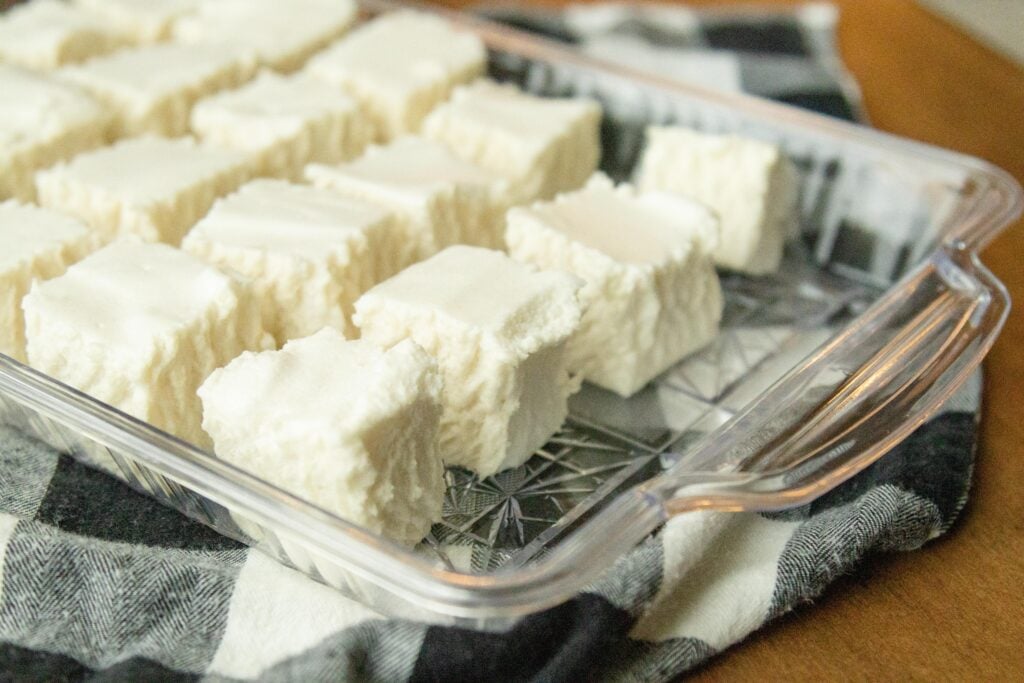
While beating the marshmallow mixture, prepare the pan. Spray the pan with nonstick spray (or line it with parchment paper). Then spread the marshmallow batter into the pan and let it cool for at least 4 hours, or overnight.

Cut the marshmallows and toss in powder if you wish.

Enjoy!
How to Store Homemade Marshmallows
Store marshmallows in an airtight container at room temperature for about one week. Stored in the refrigerator, marshmallows can last for up to two months, and in the freezer, they can last for up to six months. (They don't actually freeze super hard, so I've found the freezer to be a great place to keep them!)
Some people only keep theirs in the fridge and some people say never to store them in the fridge, they'll lose their fluffy texture. So, do what you wish.
Flavored Marshmallow Options
This recipe calls for vanilla extract, but there are other flavoring options you can try. Such as peppermint extract, almond extract, etc.
Or, swirl in some melted chocolate right after spreading the marshmallow mixture in the pan.
Tips, Tricks and Notes
- Maple syrup is a great alternative to honey in this recipe. (And I actually almost prefer the maple syrup flavor over honey!)
- Marshmallow cutting tip: grease your knife with spray or oil, or run the knife blade under hot water to heat it before cutting. Otherwise the marshmallows may try to stick fast.
- If you want to roast these marshmallows over a fire, either: let them dry out for a day or two, chill them in the fridge or freezer, or wing it and roast them real quick before they melt into the fire.
- Use a greased metal cookie cutter to cut fun marshmallow shapes!


More fun recipes to try:

And if you like DIY recipes you may also like Homemade Taco Seasoning and Homemade Condensed Cream Soups (Mushroom & Chicken).
Share this Easy Healthy Homemade Marshmallow Recipe

Healthy Homemade Marshmallows
This Easy Healthy Homemade Marshmallows Recipe uses natural sweeteners like honey or maple syrup instead of corn syrup, creating treats you can feel good about eating!
Ingredients
- 3 tbsp. gelatin
- ⅓ cup cold water
- ⅓ cup hot water
- A pinch of salt
- 1 cup honey*
- 1 tsp. vanilla extract
- Optional: Powdered sugar, arrowroot powder, or cornstarch - for dusting
Instructions
- First, dump the cold water into the bowl of the stand mixer. Sprinkle the gelatin onto the water and let it bloom for about 5 minutes.
- Meanwhile, mix the hot water and honey and salt together in a saucepan and bring to a boil, stirring often.
- Turn the mixer on low (using the whisk attachment) and slowly pour in the boiling honey mixture, mixing all the while. Increase the speed to high (go slow, to avoid splatter!) and beat for 5-10 minutes, until soft peaks form. Add in the vanilla extract sometime during this whipping process. (The consistency should be about like marshmallow cream.)
- While beating the marshmallow mixture, prepare the pan. Spray the pan with nonstick spray (or line it with parchment paper). Then spread the marshmallow mixture into the pan and let it cool for at least 4 hours, or overnight.
- Cut the marshmallows and toss in powder if you wish.
- Enjoy!
Notes
*can also use maple syrup instead of honey!
To cut the marshmallows: use a greased knife or run it under hot water to heat the blade, so the marshmallows don't just stick fast.
Store the marshmallows in an airtight container at room temperature for about one week. Stored in the refrigerator, marshmallows can last for up to two months, and in the freezer, they can last for up to six months.
Nutrition Information:
Yield:
56Serving Size:
1 marshmallowAmount Per Serving: Calories: 14Sodium: 1mgCarbohydrates: 4gFiber: 0gSugar: 4gProtein: 0g
Nutritional information is based on third-party calculations and should be considered an estimate only. Actual nutritional content will vary based upon brands used, measuring methods, cooking method, portion sizes, and more.
As always...
Thanks for visiting our small town! We're delighted to have you and you're more than welcome to stay awhile and explore!
'til next time,
We love you and we’ll be praying for you,
Julie
ey says
Would use maple syrup next time instead of honey, since honey loses alot of its nutrients when heated that high.