
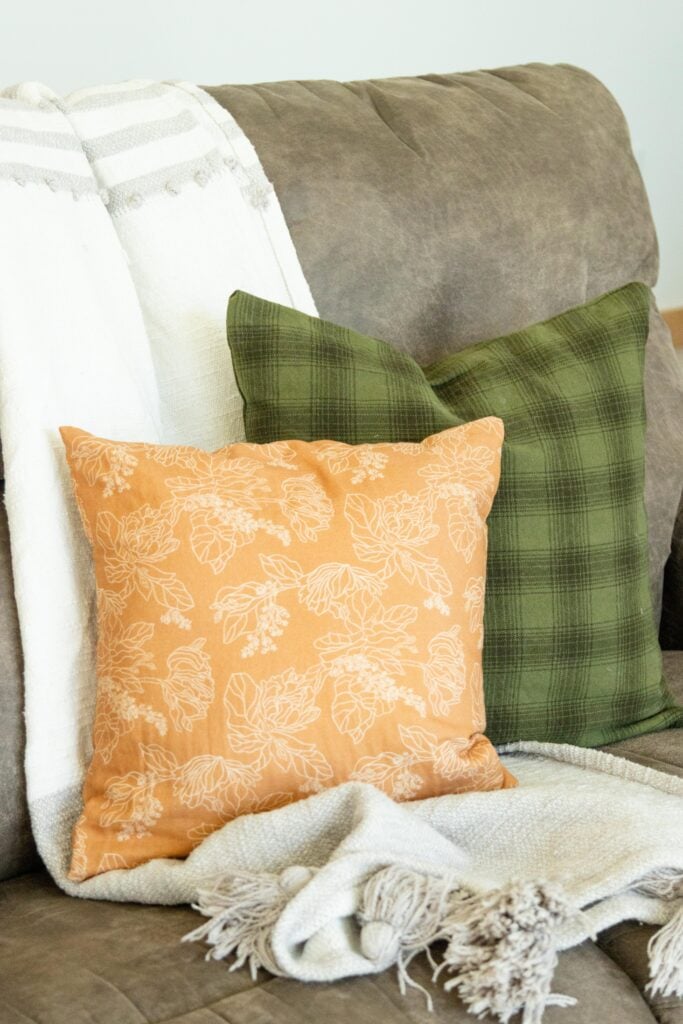
Making Easy DIY Pillow Covers is an enjoyable and creative way to update your space without spending a fortune. Take those old pillows you already have and give them a new, fresh look with this easy tutorial (that anyone can follow)!
Sew a Simple Envelope-Style Pillow Cover (in about 20 Minutes, No Pattern or Zipper Needed)
Well, this is different than my usual content! I'm not in the kitchen today, but the sewing room!
I'm a Mennonite, by the way, and I sew my own dresses (and my daughter's), coverings, slips, and yes, sometimes even pillow covers. And occasionally a few more things like this DIY Cover for the Halo Bassinet Mattress!
To make our home cozy for fall, I decided to re-cover some of my old pillows! It's really, really easy to whip together your own pillow covers. It took me a max of 20 minutes, from start to finish! Since it's such an easy sewing project, I just might make more of my own removable pillow cases to coordinate with the different seasons coming up. It's a great way to give your home a little refresh without going out and buying new pillows! And I like to sew, so there's that, too.
If this sounds intimidating, no worries! In this simple tutorial, I'm going to break down the process into simple, manageable steps that even beginners can follow with confidence. Ready to add a personal touch to your pillows? Let’s get started.
You will need:
- A pillow - an actual pillow or pillow insert you want to cover (and I assume you already have this since you're here!)
- Fabric - washable, 100% cotton fabrics are my preference. They're easy to work with and durable!
- Thread - to match the fabric or classic black or white.
- Sewing machine - I've had my Bernina B560 for 10+ years and she's still going strong!
- Cutting mat + rotary cutter - this really makes it easy to measure and cut the fabric! A measuring tape and scissors works too, it's just not quite as handy.
And that's it! Other things you might wish for are pins, a marking pencil, and an iron to iron the hems and the finished pillow cover.
This post contains affiliate links. As Amazon Associates, we may earn a small commission at no extra cost to you when you purchase through our links. Thanks for supporting our little family!
How Much Fabric Do I Need to make a Pillow Cover?
This will vary depending on the size of your pillow, and here's a simple way to figure out how much fabric you'll need to buy for the pillow cover! Fabric on bolts can be anywhere from 42 to over 100 inches wide.
- Measure your pillow. Mine is 16" square.
- How deep do you normally sew? I use my presser foot as a guide (the edge of the fabric lines up with the edge of the foot) so that makes my seams naturally ⅜" deep.
- Do the math. (The not so fun part😅) Double your seam width and add it to the pillow width. There's is your total fabric width! Then take your original pillow width times 2 and add 6". There's your total fabric length! My example: I have a 16" pillow and I normally sew ⅜" deep so my fabric piece will be 16 ¾" wide and 38" long.
So, when I go to buy fabric, I'll get a half yard (18 inches) of fabric that is the standard 44" wide.
Common Pillow Sizes + Measurements
Here are some common pillow sizes along with estimated fabric yard amounts (for the standard 44" inch wide fabric bolts):
- 16" square pillow: fabric piece should measure 16 ¾" by 38" (you'll need a ½ yard of fabric)
- 17" square pillow: fabric piece should measure 17 ¾" by 40" (you'll need a ½ yard of fabric)
- 18" square pillow: fabric piece should measure 18 ¾" by 42" (you'll need a ⅔ yard of fabric)
This is allowing for a ⅜" seam. If you're pillows are 20" or bigger you'll need to make sure the fabric is wider than 44" or either follow the 3-piece method below.
When figuring measurements, I like to add ⅜" for sewing margin, since that's normally how deep I sew. If it's easier though, you can skip that and just add 1" to the pillow width, which will leave a half inch seam allowance the whole way around. So for my pillow, instead of 16 ¾", I'd just do 17", to simplify numbers.
How to Make These Easy DIY Pillow Covers (2 Ways!)
The 1-Piece Method:
First, measure your pillow. Then figure how deep you usually sew seams. Take your seam width times two and add it to your pillow width. This is the width you'll need to cut your fabric! Then take your original pillow width x 2 and add 6" (for overlap). This will be your fabric length! My example: I have a 16" pillow and I normally sew ⅜" deep so my fabric piece needs to be 16¾" wide and 38" long.

Cut your fabric piece. Using the measurements you took in step #1, cut you piece of fabric! A cutting mat and a rotary cutter make this super easy, but you can measure with a measuring tape and cut with scissors, too.

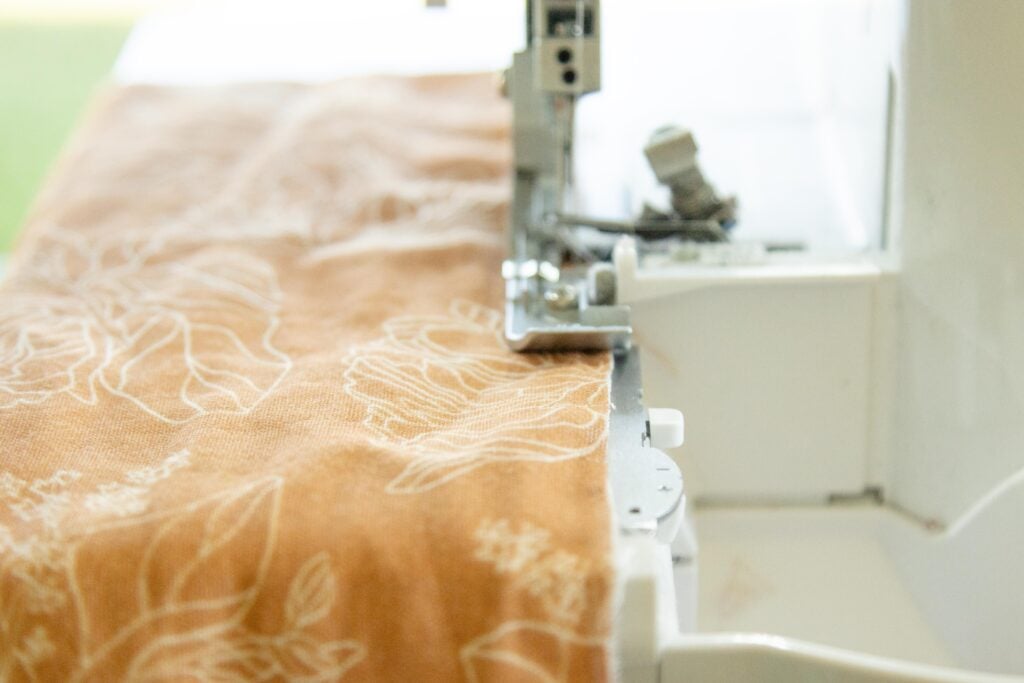
Hem the short sides. You can either serge and hem, or just fold the fabric under and sew twice to make a nice, finished hem that won't fray.

Measure, fold and sew! Lay the long piece of fabric out on a table, right side up. Measure your pillow width in the center of the fabric piece (and mark it with a fabric marker) then fold in both hemmed ends, overlapping in the center. Pin to keep it in place, then stitch both sides shut with the sewing machine. (To keep this raw edge from fraying, also do a zig-zag stitch down the seam or serge with a serger or cut with a pinking shears.)
Flip the cover inside out and put it on the pillow!

The 3-Piece Method (the one I used today)
First, measure your pillow. Then figure how deep you usually sew seams. Take your normal seam width times two and add it to your pillow width and length. This is the fabric measurement for the front panel! Now, divide the pillow cover front measurement in half, and add 3" to each half for overlap. This is the measurement for the 2 back panels! My example: I have a 16" pillow. So my front piece needs to be 16¾". My two back pieces each need to be 16¾" by 11".
Cut your fabric pieces. Using the measurements you took in step #1, cut your 3 pieces of fabric! A cutting mat and a rotary cutter make this super easy, but you can measure with a measuring tape and cut with scissors, too.


Hem the back pieces. You'll only need to hem one long side on both of the back pieces, either by serging and stitching or folding under and stitching twice to make a nice, finished hem that won't fray.
Pin in place and sew! Lay the large piece (right side up) on the table and lay the 2 smaller pieces (right side down) on top of the large piece, overlapping the hemmed edges in the center. (Pin if you wish! Or wing it, if you're like me.) Stitch all around the outside of the pillow cover, then finish with a zigzag stitch, serge, or cut with a pinking shears to keep the fabric from fraying.


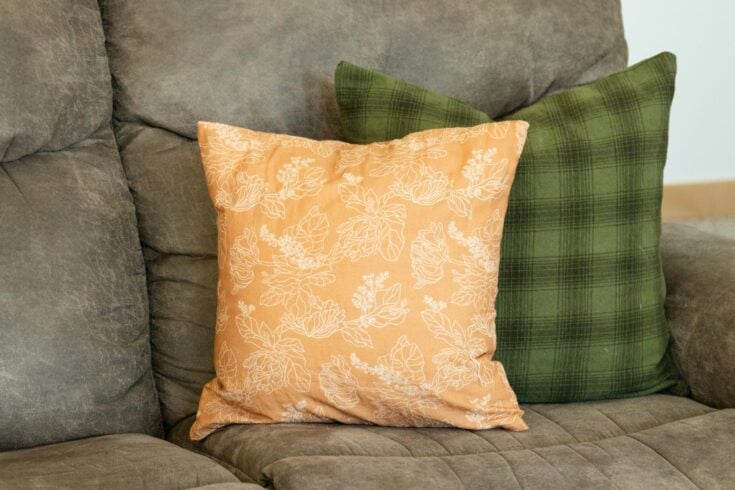
 All finished!
Flip the cover inside out and put it on the pillow!


Notes
- These methods are for square pillow covers, but you can totally make envelope pillow covers for rectangular pillows too, you'll just have to measure accordingly.
- When figuring measurements, I like to add ⅜" for sewing margin, since that's normally how deep I sew. If it's easier though, you can skip that and just add 1" to the pillow width for plenty of sewing margin.
- The one-piece way works great for smaller pillows, and the 3-piece way works great for larger pillows, or when you're working with a narrow piece of fabric or a large fabric scrap. (I used the 3-piece method today, as you can see in the pictures. And if you notice, I hardly had enough fabric so that's why my overlap isn't very big in the back!)
Share this Easy DIY Pillow Covers Post!

Easy DIY Pillow Covers
Making Easy DIY Pillow Covers is an enjoyable and creative way to update your space without spending a fortune. Take those old pillows you already have and give them a new, fresh look with this easy tutorial (that anyone can follow)!
Materials
- Fabric
- Thread
Tools
- Sewing Machine
- Fabric Cutting Mat & Rotary Cutter (or measuring tape and scissors)
- Marking pencil
Instructions
The One-piece Pillow Cover:
- First, measure your pillow. Then figure how deep you usually sew seams. Take your normal seam width times two and add it to your pillow width. This is the width you'll need to cut your fabric! Then take your original pillow width x 2 and add 6" (for overlap). This will be your fabric length! My example: I have a 16" pillow and I normally sew ⅜" deep so my fabric piece needs to be 16¾" wide and 38" long.
- Cut your fabric piece. Using the measurements you took in step #1, cut you piece of fabric! A cutting mat and a rotary cutter make this super easy, but you can measure with a measuring tape and cut with scissors, too.
- Hem the short sides. You can either serge and hem, or just fold the fabric under and sew twice to make a nice, finished hem that won't fray.
- Measure, fold and sew! Lay the long piece of fabric out on a table, right side up. Measure your pillow width in the center of the fabric piece (and mark it with a fabric marker) then fold in both hemmed ends, overlapping in the center. Pin to keep it in place, then stitch both sides shut with the sewing machine. (To keep this seam from fraying, also do a zigzag stitch down the seam or serge with a serger or cut with a pinking shears.)
- Flip the cover inside out and put it on the pillow!
The 3-Piece Pillow Cover
- First, measure your pillow. Then figure how deep you usually sew seams. Take your normal seam width times two and add it to your pillow width and length. This is the measurement for the pillow cover front! Now, divide the pillow cover front measurement in half, and add 3" to one side of each half for overlap. My example: I have a 16" pillow. So my front piece needs to be 16¾". My two back pieces each need to be 16¾" by 11".
- Cut your fabric pieces. Using the measurements you took in step #1, cut your 3 pieces of fabric! A cutting mat and a rotary cutter make this super easy, but you can measure with a measuring tape and cut with scissors, too.
- Hem the back pieces. You'll only need to hem one long side on both of the back pieces, either by serging and stitching or folding under and stitching twice to make a nice, finished hem that won't fray.
- Pin in place and sew! Lay the large piece (right side up) on the table and lay the 2 smaller pieces (right side down) on top of the large piece, overlapping the hemmed edges in the center. Stitch all around the outside of the pillow cover, then finish with a zigzag stitch, serge, or cut with a pinking shears to keep the fabric from fraying.
- Flip the cover inside out and put it on the pillow!
Notes
- These methods are for square pillow covers, but you can totally make envelope pillow covers for rectangular pillows too, you'll just have to measure accordingly.
- When figuring measurements, I like to add ⅜" for sewing margin, since that's normally how deep I sew. If it's easier though, you can skip that and just add 1" to the pillow width for plenty of sewing margin.
- The one-piece way works great for smaller pillows, and the 3-piece way works great for larger pillows, or when you're working with a narrow piece of fabric or a large fabric scrap. (I used the 3-piece method today, as you can see in the pictures. And if you notice, I hardly had enough fabric so that's why my overlap isn't very big in the back!)
As always...
Thanks for visiting our small town! We're delighted to have you and you're more than welcome to stay awhile and explore!
'til next time,
We love you and we’ll be praying for you,
Julie

Leave a Reply